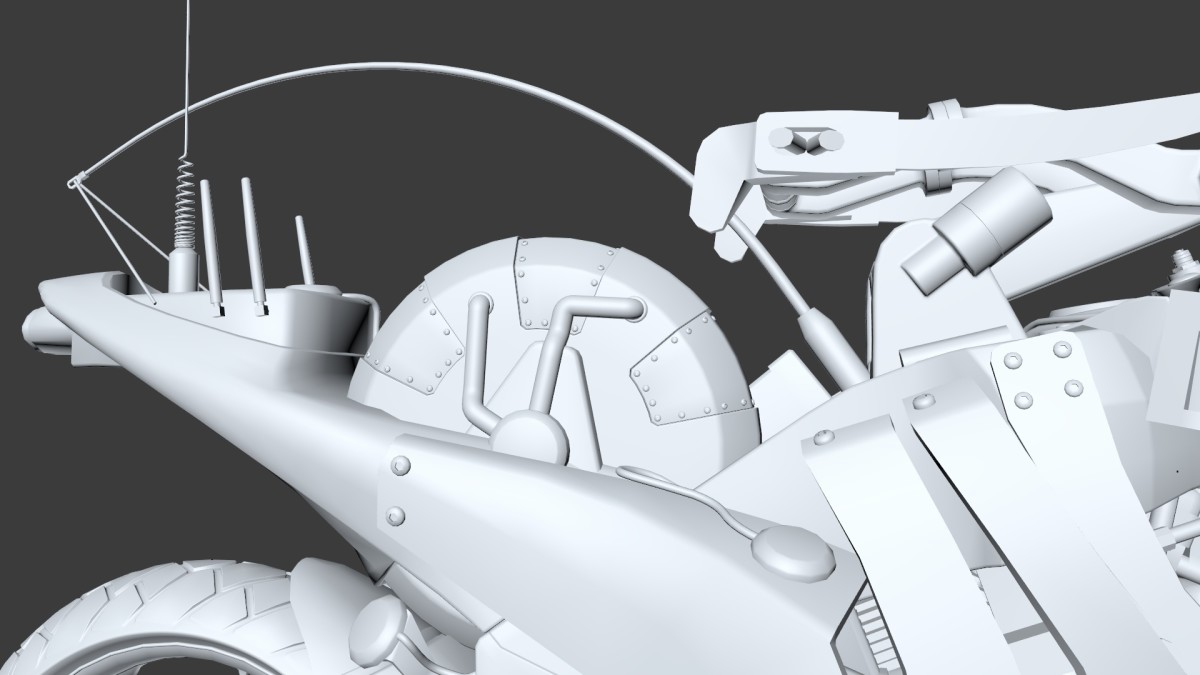
In this installment of the Razorback series, I’m adding additional detail to the already stylized K.E.R.S. housing for the machine.
Initially we create some arbitrary indentations and realign the cabling to fit. While creating the indentations, we ensure that the edges are realistically beveled. Once we’re happy with the indentations, we actually set them up to look like removable panels. After the panels have been crafted, we use a technique first outlined in my Constraining Objects to a Surface screencast to place a series of bolts onto the panels.
I hope you enjoy this return to the Razorback creation, and as always let me know what you liked in the comments section.
alflud
January 4, 2014 — 3:50 pm
Jamie, a tip for you my friend ….. at 8:48, when you’re editing the phong
tag – there’s another way to address these soft-shading issues. You can
select the edges of your new bevels – just the outside edges of the bevel,
where the bevel meets planar geometry – and then chose the option ‘break
phong shading’. Sometimes you might want to retain a high level of
smoothing on one section of a unified mesh but have some hard breaks in
other sections and this will do that for you – without needing to add
additional geometry as with the extrude inner 😉
Thanks again for these awesome videos mate.
edit; actually, once you made your Fill Selection and have those planar
polys selected …. you can then use the Outline Selection command to
quickly select the edges that you need to break. Fill select, outline
select, break phong shading … that’ll do the trick for you.
Kyle Smeby
December 31, 2013 — 7:59 pm
That constraint trick is awesome! Thanks.
Steve Langley
December 31, 2013 — 9:38 am
Hey Jamie, Good to see you haven’t forgotten this bike build. It’s coming
together nicely and i’m still learning lots along the way. Thanks.