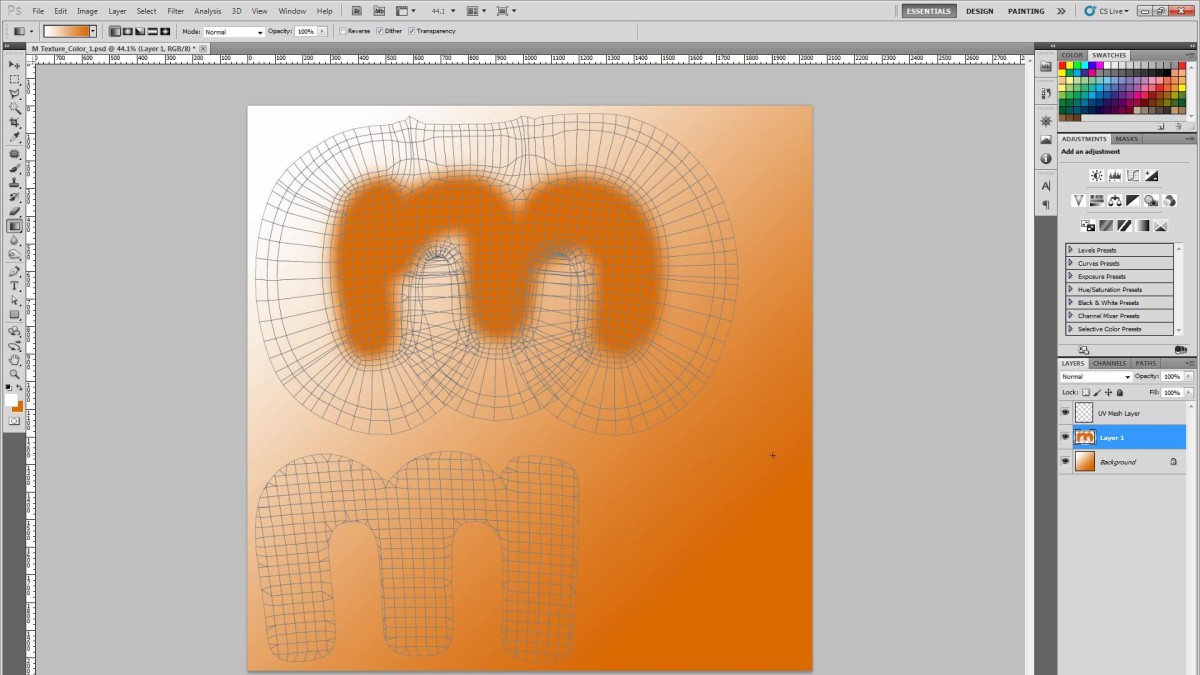
This tip takes a quick look at one of my favorite Cinema 4D texturing features; the Create UV Mesh command. Creating a UV mesh layer is primarily useful for taking your UV mapped object into another painting package for additional texturing work. BodyPaint 3D provides a comprehensive toolset for painting and editing textures, but Photoshop is the standard, and a lot of texture artists prefer it.
Check out the video below for the technique.
threeheys
November 10, 2016 — 7:50 am
I had trouble creating the UV Mesh Layer and realized the texture was not actually selected in the Objects Manager pane. Make certain the texture is selected.
Bruce Brachman
September 21, 2013 — 2:08 pm
Jamie:
I know this is basic but I still have trouble creating UV textures and setting up the flat file so I can paint in Photoshop. I know that you have to select edges and go into the UV setup. Use the Wizard. But my results always have the polygons spread out all over the place. You did it with the ‘m’ and I wonder if it is worth a quick tip on how to unwrap a 3d mesh.
Thanks.
Bruce
Jamie Hamel-Smith
September 28, 2013 — 2:21 am
Hey Bruce,
Check out my UV mapping videos. There’s three of them I believe, and they should give a good intro. UV Mapping is hard and takes practice. Repetition is key.
kesmeby
May 6, 2013 — 4:04 pm
Nice to see another method to get these textures in and out between PS and C4D. Your method is a lot more orderly than the way I had been doing it–and should be a lot easier to reproduce. Basically my method involved clicking on every menu available between the BP layout and my usual custom layout until it worked.
Jose Luis Tutoriales
May 3, 2013 — 1:52 pm
if you go to photoshop, do the textures in diferent layers, how can I re edit this layers in bodypaint? I known that is possible but I don´t know how
gokhan
May 3, 2013 — 8:27 am
Thank you very much for Great tips 😉
I was asked to you “how can I do that…?”
and here is answer,it’s very easy and nice 😉
Thank you very much again for help my friend 😉
bye.