The Typical Scenario
You’ve got a patch of grass, or a ceramic tile, and you need to use it as a pattern. You select the best section you can find, crop it into a nice manageable square, and when you tile it, you realize that the Luminance varies across the image and you’re not sure how to make it all even.
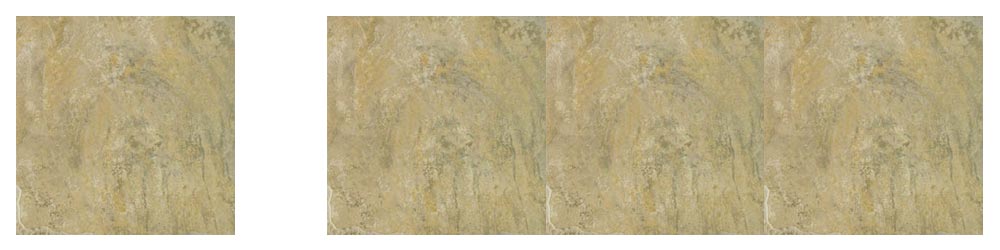
![Here's the original image of our ceramic tile [Far Left] and some copies of it combined to form a pattern. I'm sure you can see the problem.](https://jamie3d.com/additional_files/psdcrop_tutorial/orig_tile.jpg)
The Lab Color Mode
You may be familiar with image color modes, and if you are, then you know that the RGB color mode is usually the mode of your image. You can change the color mode from the Image > Mode > Menus. One of the available modes is the Lab color mode, and to even out our luminance, we’ll need to convert the image to this mode.
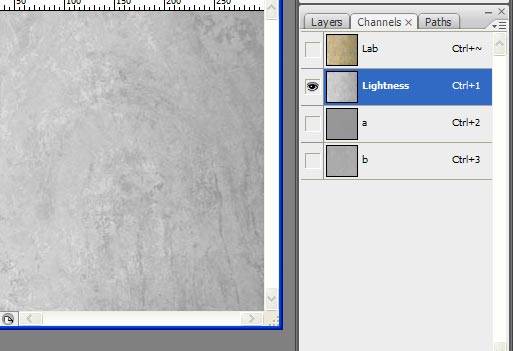
The Lab mode doesn’t use Red Green & Blue to represent our image like RGB does, It instead uses 3 channels named “Lightness”, “a”, and “b”
The Lightness Channel should show you a nice Grayscale image of the Luminance information contained in the image.
The High Pass Filter
We can now run a filter or adjustment that will affect the lightness of the image. The Filter we’ll use is called “High Pass” and it’s under the “Other” submenu in the “Filters” menu. The “High Pass” filter is quite useless if used on RGB images in my opinion; On the RGB channel, the “High Pass” filter will suck color out of your image and create messy halos everywhere. It can however, do wonders if used on the Lightness channel of an image in the Lab mode. (Yay for us!)
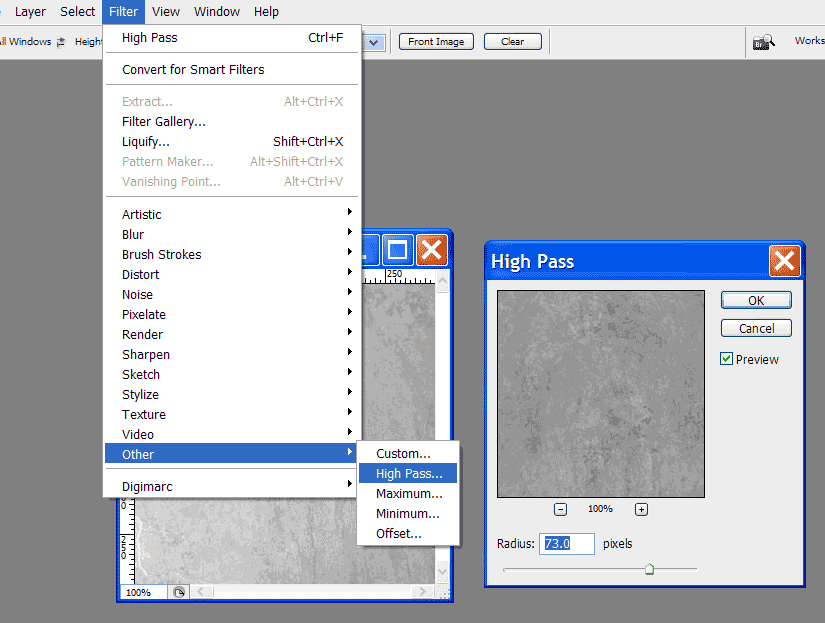
Applying the “High Pass” Filter
With the Luminance Channel selected, apply the the “High Pass” filter. It will seem to make the channel a dull grey if the radius setting is set too low, and it will probably be more use to us near the higher end of the radius slider. Take some time to experiment with the slider.
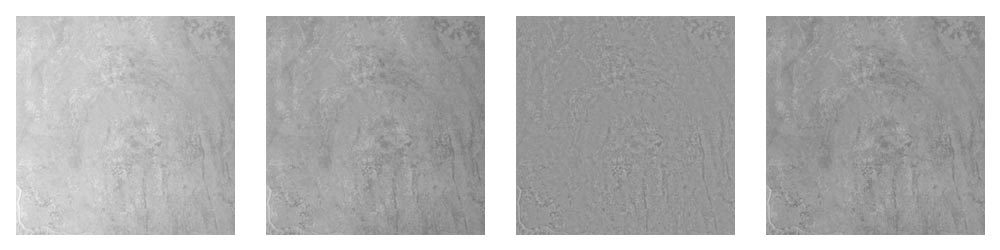
We can see that our image’s darker right side seems to disappear as the “High Pass” filter is applied. Those of you with really sharp eyes will also notice that as you adjust the slider, the brightness changes. The major side effect of using the “High Pass” filter in this manner is that it averages the general brightness of the channel it’s being applied to. For us, this means that our tile will probably be darker than it was before. Because of this, it’s a good idea to work on a copy of the Image. Once done applying the filter, you can correct the brightness of the image with the before and after images side by side. (The Image > Duplicate… command is great for this.)
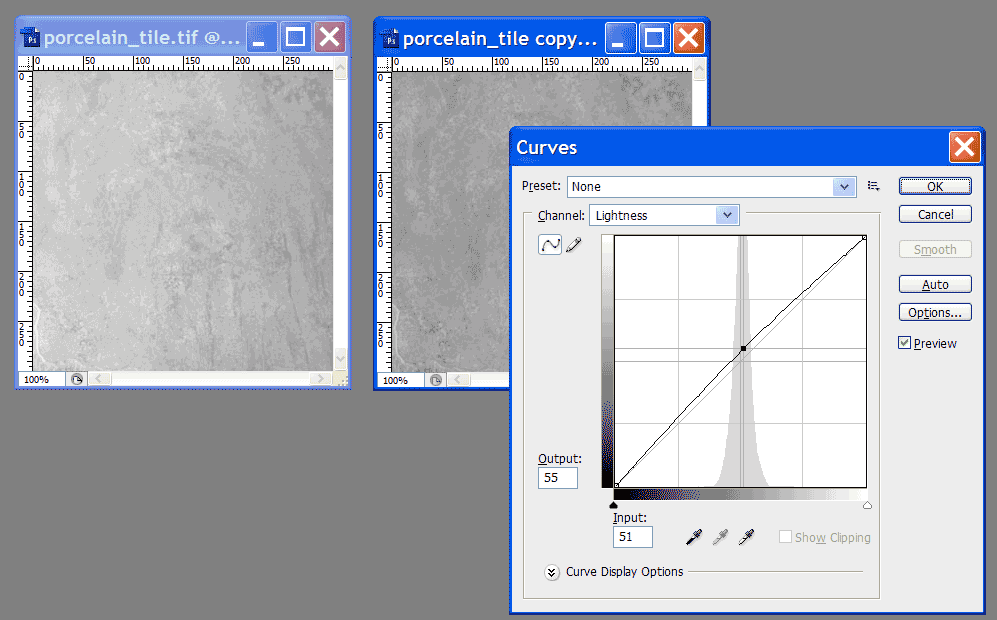
Once the adjustment has been made, you are free to return your image to the RGB color mode using the Image > Mode > Menu once again.
The End Result
Now that the Luminance is nice and even across our tile, we can feel free to repeat it along a floor or background without seeing the light and dark areas repeating so predictably.
What’s Next…
You could take this a step further by using the “Offset” filter, offsetting the image by half it’s width / height and then using the “Rubber Stamp” or “Healing Brush” to get rid of the seams. That extra step would give you a perfectly tileable image.