Instead of a Five Minute Tip this week, I thought I’d produce something a little different. One of the more challenging tasks that I face when modeling a motorcycle (something I’ve become quite practiced at) is the creation of the tires. Below is a screencast walking you through the process I’ve recently used. I’ve also included the downloadable project files for you to play with.
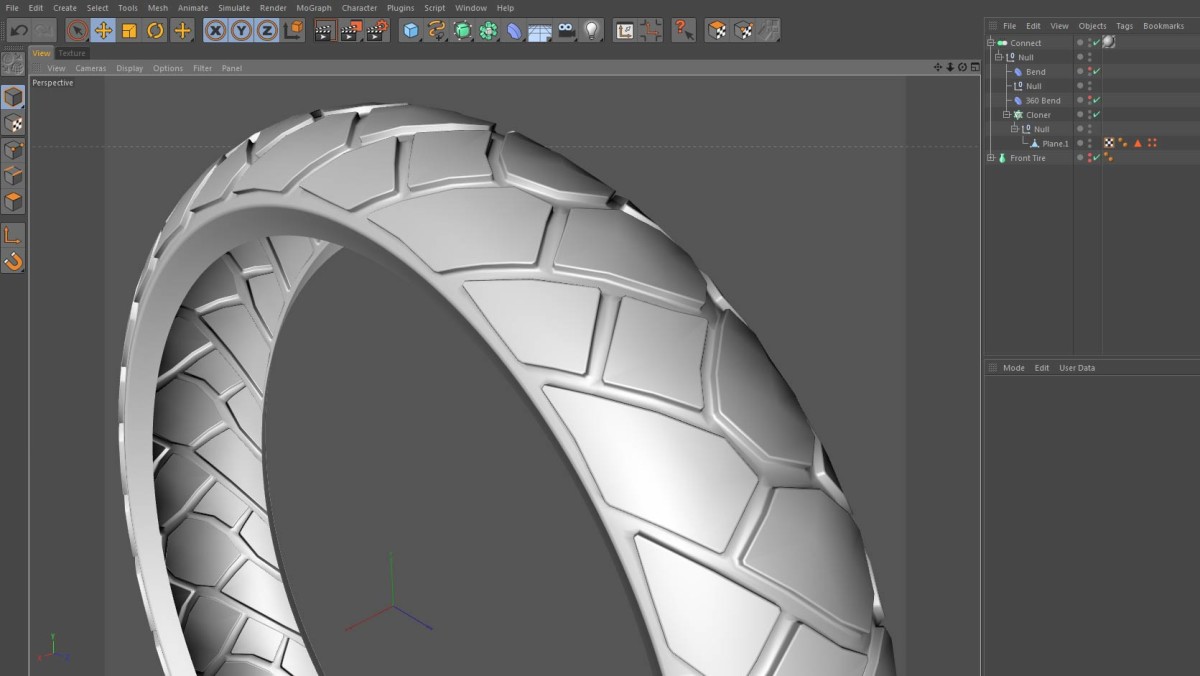
Part of the issue comes from the fact that a motorcycle tire curves on more than one axis, and yet must still contain intricate repeating patterns. The technique in the video below is not new; it’s not even my original technique. (I remember seeing someone using 3D Studio Max demonstrate it for a car tire) What’s different about this approach is; the use of two deformers on opposing axes working together to curve the tire, and the MoGraph Cloner object.
There’s also a bit of math in here! We use π to accurately position one of the deformers. Even with the help of our favorite mathematical constant, it’s still a long and involved process to explain. The video below is roughly 45 minutes long, so grab a cup of Coffee or Tea, kick back, and enjoy.
Project File:
I’ve included the intended look of the tire as a downloadable zip file: front tire project file for Cinema 4D.
The file should open in Cinema 4D versions R12 and higher.
Note:
You’ll notice in the video that I’m really bothered when I can’t figure out how to create the correct polygon flow to make the tread patterns that were in my reference material. I actually spent another hour or so re-modeling the original “plane” segment of the tire, and that’s why the downloadable file looks quite different from the tire in the screencast. As long as you maintain the border edges of the tread segment, you can start to build and model any shape you want for the raised parts of the tread segment—this is what I ended up doing.
Zooreka
November 25, 2016 — 9:49 am
One of the best C4d Tuts I’ve seen… Great Job! This stuff is Tricky and advanced… but really well explained…. Many thanks for sharing the technique
Glendon Tingson
March 12, 2015 — 11:53 am
Very Good Tutorial Sir. most of the wheel tires are very tricky to look at
and very hard to figure out how and what way to do to model a similar tires
we want, BUT in this tutorial its like an awesome magic trick like a blink
of an eye. Thanks for the tutorials sir.
Sonia Peixoto
January 22, 2015 — 6:20 pm
fantastic video
Phakeme Fakazi
January 14, 2015 — 7:15 am
Nice tutorial.
cdcdcd6777
September 22, 2014 — 7:08 am
i did enjoy it. subscribed!
more plz thanks
Egor Anufriev
September 14, 2014 — 12:22 pm
Hello there! Can I download the video somewhere?
Wim Dam
September 10, 2014 — 8:50 pm
very good tutorial. I enjoy the way you express your thoughts.
ikola one
August 28, 2014 — 10:31 pm
Really great tut’, the brush is an awesome tool ! Thx for sharing, your a
good teacher ^^
leonardo sastre
March 11, 2014 — 4:29 pm
muy buen tutorial! gracias!
shyaka rene
March 1, 2014 — 11:47 am
nice tuto, i like it ! i think your technics can be applied to cars tires
too! Am i worng?
Daniel Liska
February 27, 2014 — 3:58 am
Thanx for sharing
David Caro
December 29, 2013 — 4:49 pm
Nice technice! Ill try it!! Thanks.
Boonchuay Chokchai
December 27, 2013 — 8:33 am
RC Mansion
August 25, 2013 — 6:11 pm
would’nt it just be much more simpler with a tube and
then for the patterns you extrude splines and set it in a radial cloner?
Jamie Hamel-Smith
August 25, 2013 — 7:32 pm
You would think so, but this seems to be the better way.
Gamer2k77
April 20, 2013 — 5:07 pm
how do u get the begin tire by me it doesn’t work
hawk08ht
April 15, 2013 — 7:34 pm
umm which software?
Gamer2k77
April 20, 2013 — 5:06 pm
cinema 4d
Jamie Hamel-Smith
May 1, 2013 — 4:32 am
Cinema 4D. You can get a free demo at maxon dot net
hawk08ht
April 15, 2013 — 7:30 pm
Excellent work man
demafleez
February 14, 2013 — 9:43 pm
great tutorial. loved your particular approach by keeping everything as live as possible. looking forward to more tutorials in this vein. cheers!
Jamie Hamel-Smith
February 14, 2013 — 9:50 pm
Thanks! I’m glad you liked it. I see you’ve got some tips to offer too. I’ll be subscribing to your site 🙂
stevep67
February 2, 2013 — 10:45 pm
Excellent tut, Jamie. Thanks for sharing!
Jamie Hamel-Smith
February 7, 2013 — 5:13 am
Hey, thanks for the kind words! I’m glad you like it.