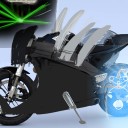
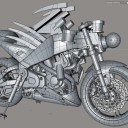
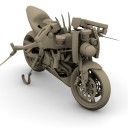
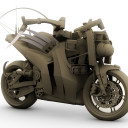
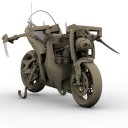
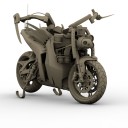
The Razorback; a sword-wielding robotic riderless motorcycle. It sounds like something from a childhood Saturday morning cartoon… but deadly. A motorcycle designed for killing and driven by a computer; Razorbacks are truly the stuff of nightmares. Daniel Suarez’s Daemon describes these machines, and I am attempting to bring one to life in 3D.
Here’s an index of the Razorback posts on this blog along with the duration of the respective videos:
- Introduction – 10:55
- Removing Components – 40:28
- Flywheel Housing and Sword Blades – 23:52
- Steering Mechanism – 30:26
- Steering Mechanism Linkages – 29:08
- Steering Servo Brackets and Kickstands – 29:04
- Kickstand Pivot and Ram Brackets – 38:35
- Start of LIDAR and FLIR Instruments – 22:18
- Robotic Arms Shape and Layout – 17:29
- Robotic Arms Base and Rough Shape – 30:49
- Blades Mounting System – 24:53
- Blades Shape and FLIR Adjustments – 20:37
- Instruments Tweaking and a Test Render – 29:34
- Refining the Robotic Arm Base – 46:01
- Refining the Lower Robotic Arm – 33:33
- Refining the Upper Robotic Arm – 31:58
- Tweaking the Upper Arm and Kickstands – 38:17
- Splitting the Upper Arm Into Two Parts – 22:52
- Joining the Upper Arm to the Wrist Pivot – 22:07
- Hazcams and Hazcam Brackets – 33:47
- Starting the Armor Plating – 23:29
- Continuing the Armor Plating – 19:25
- Mounting the Rear Shock – 21:01
- Adding Antennas to the Rear of the Machine – 30:01
- Adding GPS Antennas and Brackets – 20:13
- Detailing the FLIR Turret – 28:52
- Adding Detail to the Instrument Brackets – 35:54
- Adding an Armor Bracket to the Lower Cowl – 20:03
- Setting the Thickness of the Armor Panels – 29:23
- Adding Cabling for Some of the Sensors – 37:28
- Refining the Kickstands and Adding Hoses – 24:30
- Adding XPresso to the Kickstand Hoses – 16:35
- Breaking the Symmetry of the Arms – 22:27
- Adding Bolts and Clamps to the Kickstands – 30:45
- Refining and Smoothing the Kickstand Brackets – 37:26
- Creating Brackets for the Infrared Arrays – 23:26
- Adding the Tires and Creating Basic Materials – 33:34
- Adding Materials to the Brackets and Instruments – 21:01
- UV Mapping the Side Armor Plates – 27:25
- Painting the Main Armor Plates – 32:27
- UV Mapping the Large Arms – 20:15
- UV Mapping the Upper Small Arm – 26:35
- UV Mapping the Lower Small Arm – 24:24
- UV Mapping The Large Arm Base – 28:50
- UV Mapping the Arm Base Pivot – 18:23
- Combining The UV Maps Into One Texture Space – 21:50
- Painting the Mapped Arm – 17:40
- Mirroring the Right Arm and Texturing the Rotor – 20:41
- Posing the Machine and Setting Up a Camera – 28:27
- Adding Detail to the K.E.R.S. Housing – 24:02
- Additional Detail for the K.E.R.S. Housing – 23:43
- Adding Battery Terminals – 22:24
- Creating Battery Cables – 10:48